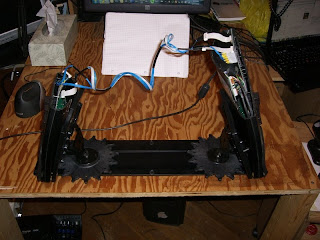
I've tried a number of keyboards and keyboard setups to put less strain on my arms because of my RSI. My latest attempt is to take my Kinesis Advantage keyboard which I think has the best layout of any of the ones I've used, split it apart, and mount it on the super configurable base from the CK comfort keyboard. Here are some pictures of how it went. I've just started using it today and so far it seems to be working nicely. The kinesis keyboard was $160 refurbished and the comfort keyboard was $330. Plus the hours it took me to cut apart and solder the extension wires for the kinesis. But hey, being able to type enough is worth more than $500.
First I opened the Kinesis.
I added extensions to the 3 connections to the pcbs on one side. For the 2 that use flat flexible cable, Kinesis was awesome enough to send me some extra flat cable and the sockets so I built standalone extenders with a socket on each end and then connected them to the pcbs on either end using the short FFC cables. You can see this in the foreground. For the thumb buttons, I cut the jumper ribbon cable and soldered my extension cables straight to both sides. I used little pieces of insulation from thicker cable as sleeves that I covered the solder junctions with. Those are the yellow thing you see. I used heat shrink tubing to bundle the wires together. I mostly used very thin wire (don't know the gauge) but ran out before I was quite done so I used a bit of ribbon cable.
 The comfort keyboard comes with 3 sections. I took one off because I only need 2. Then I unscrewed the bottoms of the 2 remaining sections from the comfort keyboard sections and screwed them into the bottom of the kinesis sections.
 All done!


3 comments:
Coool!!
What Dremel bit & speed did you use for the cutting? Any lessons learned or suggestions for next time?
Could you show even more photos? Kinesis sold you the parts, thats great.
Post a Comment